hi

Wild Caught Snapper with Leeks and Mushrooms
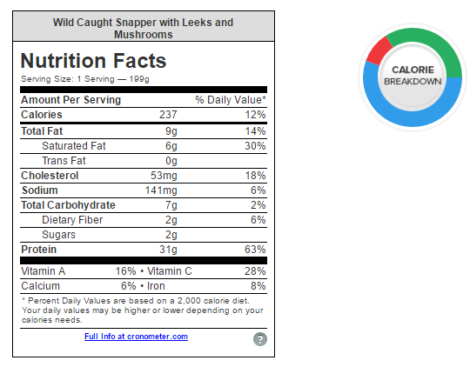
 Today’s recipe is simple and relatively easy to make. It’s a GAPS “approved” dish, and low carb, as you can see from the nutritional facts below.
I suggest having a salad with this dish to make it a complete (low carb) meal. You may want to try the Baby Dino Kale Arugula Salad.
Of course, if you are not following a low carbohydrate, anti-inflammatory, gut-healing nutritional protocol, you can add to this a starch such as quinoa, winter squash, etc. I would still recommend you stay away from gluten contacting grains.
Aim to make it one time this week. You can make a similar one using chicken, or any other meat with the same or different vegetables and adjust cooking time accordingly.
Leave a comment below and let me know if you like it. Share if you do.
Thank you, and please come back for more.
Wild Caught Snapper with Leeks and Mushrooms
Ingredients:
- 1 lb snapper
- 1 leek (white part only)
- 1/4 large bell pepper
- 1 big Portobello mushroom
- 5-7 Shiitake mushrooms
- 2 cloves garlic
- A small bunch dill
- S & P to taste
- Coconut oil (liberal amount)
Instructions
- cut snapper into big (2 inches) pieces
- get a baking tray ready with parchment paper (I like using it, so I don’t have to scrub the tray later)
- place the fish on its side after you sprinkle it with S & P
- cut leek (half-moon slices)
- chop bell pepper
- chop mushrooms into big chunks, as they reduce volume considerably when cooked
- dice or run through a press, the garlic
- chop very fine, the dill
- mix all the ingredients in a bowl with S & P
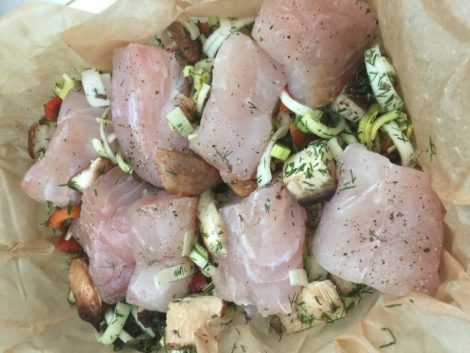
- place the vegetables on the baking tray
- add the fish to the tray, make sure is in between the vegetables (or surrounded by it)
- pour some coconut oil on top
- bake covered at 350 for 20 min
- take it out and stir/mix the fish with the vegetables
- bake for 20 more minutes at 350
- it’s ready to serve
Makes 4 large servings (leftovers can be reheated the next day in the oven).
Note: I didn’t add water or stock to it, as I wanted to have it cooked in its own juice, but you can certainly add 1/4 cup stock or water for a softer end product.
Would you like to get the downloadable, printable version of this recipe with step-by-step visual instructions? Click here.
Is your kitchen ready for cooking to heal? Not sure? Get the Kitchen Tools Resource Guide and see my top “must have” resources to make healing foods. OH, did I mentioned that it’s FREE?